Sunday, November 29, 2020

How to Change Blade on Miter Saw in 3 Easy Steps

How to alternate the blade of a miter saw is something every DIYer has to realize. Here's a quick overview of the 3 smooth steps required to replace a blade.

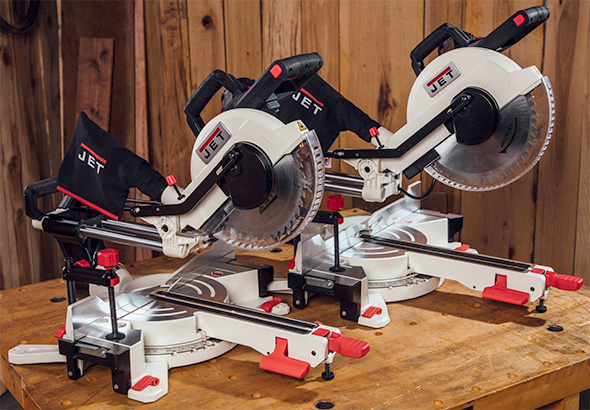
Here's a quick take a look at the way to trade a blade on a miter saw because if you have a DeWALT, Ryobi, Hitachi, Bosch, Delta, Craftsman, Porter-Cable, or every other emblem of the miter saw, in some unspecified time in the future you may need to update the blade.

Why alternate miter saw blades

There are numerous reasons why you can need to trade the blade on your miter saw. Your blade may be stupid. You might also have a wooden slicing blade hooked up in your miter saw, however, you do want to cut a few steels. Or you could have a 24 enamel blade established which is ideal for reducing studs, but you want to put in a 100 tooth blade to reduce some portions for a furniture project.

The miter saw blade is dull

Probably the most not unusual purpose for converting a miter saw blade is that the blade has grown to be dull and is now not producing nice cuts.

What kind of blade should you get if the miter saw the blade is dull? That will in large part depend upon the sort of cuts you're going to make and we can delve into this later in "Different Miter Saw Blades for Different Cuts."

In the meantime, if you are like me and most of your miter cuts are for DIY furnishings initiatives, I genuinely love the Freud Diablo Ultra Fine 100 Tooth Saw Blade. This is the blade that I mounted at the miter saw in my little workshop. The cuts are easy and sharp, precisely what I need for my DIY furnishings tasks.

Is your blade sincerely stupid?

Did you realize that a dirty blade can act like a dull blade? With each cut, we cause the timber pitch to accumulate on our miter saw blades. As the timber builds up at the blade, it can affect the nice of the cuts, main us to think that the blade is dull. If left unchecked, this timber step also can corrode the blade.

How do you eliminate wooden tar from the miter saw blade? With a unique cleaner for blades and bits. Cleaning our miter saw blades is very simple and a critical part of the proper renovation of our tools. Visit Clean Saw Blades for pinnacle overall performance and satisfactory cuts to peer what cleaner I use, the simple technique I use to clean my saw blades, and the saw blade cleansing video.

Different Material Miter Saw Blades

Another cause to change the blade for your miter saw is to cut an exclusive material. Saw blades are designed to cut particular substances. Not to make this sound too simple, but if you need to cut some wooden, you may need a blade designed for cutting wooden and if you want to cut some steel, you will need a blade designed for slicing steel.

Different miter saw blades for one of a kind cuts

Once you have got determined what kind of cloth to cut, the following element to study is the range of teeth on the blade. I am no longer an expert on building saw blades, however, right here is my simple look at how the wide variety of tooth works on a miter saw blade.

Saw blades with extra teeth produce cleaner, sharper cuts, at the same time as blades with fewer enamel produce tough, choppy cuts. Blades with more teeth are wonderful for slicing portions for our DIY furniture initiatives. Blades with fewer teeth are brilliant for slicing studs and building a home in which you don't care what the reduction seems like.

How to alternate the miter saw blade

This academic shows a way to replace the saw blade on a Hitachi 10 ”miter saw. Consult your proprietor's guide for a way to alternate the blade on your unique miter saw. Do you pass over the manual to your notice? Don't worry, most contemporary device manuals are available on-line. Just Google the call and model of your saw or tool (as an instance, the Hitachi miter saw manual) and I guess you will discover the manual in your saw.

Step 1. Remove the axle cover. Rotate the blade protect to the higher function. Remove the front axle cover screw and permit the axle cowl to rotate over the rear screw out of the way.

Step 2. Remove the sheet. Press the spindle lock to absolutely lock the spindle. If the axle lock can not be completely locked, turn the axle with a 10mm wrench at the same time as making use of pressure to the axle lock.

Final thoughts

How to change the blade of a miter saw is something that every DIYer should know. Whether you have a DeWALT, Ryobi, Hitachi, Bosch, Delta, Craftsman, Porter, or other brand miter saw, at some point, the blade will need to be replaced. Use the 3 steps in conjunction with your miter saw owner's manual to easily replace a blade.

How to Unlock Ryobi Miter Saw

The Ryobi miter noticed lets you the freedom to reduce with admire to the angle of the workpiece and the perspective of the saw blade. Transporting the device is straightforward because the arm can be pushed down and stay locked in a closed role. Using the device is as easy as pressing down on your arm and pulling out the locking pin.

If you're a newbie or someone interested in the running capabilities of the Ryobi miter saw, this guide will help you get started out figuring out how to unlock a miter noticed. You also can use this article for future reference.

Unlocking Ryobi's Miter Saw

The method ought to be easy and easy. Depending on the version you own, there are a few steps you want to recognize to understand the way to unencumber your miter saw. The cause behind blocking off the saws is for protection.

Head unlocking

To release the miter noticed head, practice some strain to it while looking for a lever or pin to preserve a number of the components together. A contemporary unit has a knob or pin designed to lock the mechanical ankle. The knob is located somewhere near the center factor.

Pull that pin to put off it to free up the head. If you have a sliding model, the lock has to be on one aspect and must be loosened for its mechanism to paintings as anticipated.

Unlock the desk or base

Once the heating has been unlocked, the desk has to be the following issue to have a look at. A contemporary unit ought to have something visible for a knob at its base. Its cause is clear as it allows movement of the bottom as the required angle is hooked up. You will be fortunate if your model has clean markings for crucial angles.

In other phrases, in place of the use of alternative ways to get the required perspective, align the rotating part of the base with a static containing preset angles.

Lock the bezel

Some fashions do not have a shifting bezel. Therefore, this step will handiest paintings for models with a bezel. On the other hand, big majorities have a rotating bezel; adjusting it for this reason way adjusting the lean and sliding the integrated prevent close to the bottom. You may additionally come across gadgets that have holes drilled to control head moves and forty-five and ninety-diploma angles also are set.

Tips and Tricks

People ought to not forget protection precautions, and that is why humans get harm or wreck machines. Wear a safety system at all times and be sure to unplug the system when making changes.

Final phrase

Unlocking and adjusting a Ryobi miter saw is not a huge deal as long as you realize what you are doing. In case of troubles, the saw calls for expert intervention; consequently, ask an expert or a skilled friend for help. Don't attempt DIY in case you're now not sure what to do.

How to Make a Miter Saw Workstation

Use those instructions to make a miter saw notebook that may be used on a job website or in a workshop. The integrated access and exit tables sit on a wood box. The boards offer the best guide for the duration of the cut.

Measure the saw platform

Find the height of the miter saw deck. This is an important size due to the fact the peak of the entry and exit tables need to be identical to the intensity of the saw deck to make sure ideal assist. For extra accuracy, use a marking gauge rather than a tape degree to degree from the pinnacle of the saw deck to a flat floor. A small aggregate rectangular will preserve the measurement correct till you exchange it.

Mark plywood

Mark the mission pieces on a sheet of plywood. A 3/four "sheet of birch plywood gives all the wooden you need for the assignment. The  sides, the top two portions, and all four panels come from one 8 'piece of plywood. After reducing those 8 pieces (marked with an X), any final portions can be used to make smaller pieces, consisting of the legs of the miter saw. Cuts needed are 9 "wide x eight 'long for both aspects; 9 "huge x sixteen" for four box ends; tops reduce from the last timber. A tread board can be used to manual the round saw through long cuts.

Mark the saw

Mark the notches on every of the two facet pieces. Use the equal combination square with the perfect size from step 1 to mark the intensity of the notch. The width of the notch is the width of the miter saw bevel swing, plus 6 ".

Make dip cuts and crosscuts

Position the table saw guide to the proper intensity, over again using the combination rectangular size from step 1. Measure from the tooth of the saw blade.

Place the primary aspect piece at the desk saw and make a reverse plunge cut to begin the notch.

Forgo cuts, use a round saw. To end cutting the notch, use a hand saw.

Repeat these cuts for the second one side piece.

Connect the corner and fix a cap

On a huge, flat surface, vicinity the 2 side portions upright with the ends of the box among them.

Screw-in the gussets into the corners to assist maintain your miter square.

Screw the corners flush and put off the gussets before attaching the top. Put a lid on every field.

Make and area skates on the saw

Make skates out of some of the plywood scraps. A skate includes pieces, an higher and a decrease one. Bevel the bottom skid to in shape easily among the perimeters of the box. The computing device walls are three/four ", so use a three/four" piece of plywood to measure the end of the skid.

Miter Saw Tips And Tricks Every Woodworker Should Know

Here are some miter saw tips, about 5 of them to help you get the most from your miter saw.

As a starting carpenter, the miter saw might be one of the maximum essential gear that needs to be on your purchasing list if you don't already have one.

It's a device to help you accomplish a lot in your store, from quickly reducing lumber and crown molding to making quick repetitive cuts that are accurate.

Although the precept of operation of the miter saw is quite easy and easy to put in force, these miter saw recommendations will permit you to get greater out of it in phrases of efficiency and safety.

Miter saw guidelines

Read on as I guide you via 15 exceptional miters saw pointers that will assist you to achieve more capability and efficiency out of your compound miter saw.

Tip no 1: make repetitive cuts using a forestall block

Whether you're making furniture on your workshop or venture a brand new building production undertaking on the activity web page, it's far pretty inevitable that you may have to make repetitive cuts.

If you're a totally skilled chippie, then you already understand this tip. You do no longer want to dial the same measurement over and over again.

You can in reality set the dimension on the miter saw, connect a stop block to the miter saw holder to the exact length that you need to reduce repeatedly, then you may make as many cuts as you want.

Tip range 2: use a mobile miter saw stand

It is almost not possible to apply a miter saw efficaciously without putting it on a stand of some type.

If you're for your workshop, you could vicinity the miter saw on a workbench and work with it like this. However, at the job web site, there'll always be a want to move the miter saw from one function to some other.

With a hard and fast workbench, that could be tough, however with a mobile miter saw stand, it is as easy as consuming a cake.

Tip a wide variety 3: install a laser

Many more recent models of miter saws usually come prepared with a laser that illuminates a skinny line throughout the workpiece, on the exact line wherein the blade will reduce.

The laser line permits you to cut faster because you don't have to lower the blade down to the road you have marked to make certain it's on the line.

Once the laser line is at your mark, you can turn the saw on, lower it onto the workpiece, and it'll undergo your mark.

What when you have an older saw that does not include a laser? Well, you don't have to sell your antique saw to buy a brand new one with a laser marker (despite the fact that you may).

In reality, you should buy laser protection at your neighborhood hardware keep or on Amazon. It may be effortlessly attached to the blade, replacing the washer that holds the blade with the laser guide, and bang, your miter saw has a laser.

Whenever you want to make a cut, you now not must stress to align the blade together with your mark.

Tip range 4: reduce wider forums along with your miter saw

If your miter saw is not a sliding miter saw, the width of the forums that you could reduce with it is confined. But you could additionally cut wider boards along with your miter saw even supposing it isn't always sliding.

Achieving this adjustment is simple, simply region a board below the extensive board you want to cut, then make the cut. You will see that your reducing potential will increase via an inch or a 1/2 inch, depending on the thickness of the board you located below.

Another way to cut wider boards is to reduce one side of the board first, then flip it over and reduce the alternative aspect.

Tip range 5: allow the blade to reach full velocity

Although it is tip quantity five, it's virtually one of the first stuff you have to find out about using a miter saw, mainly for protection reasons.

When you press the electricity button on your miter saw, you should wait for the blade to attain full speed earlier than losing it on the workpiece.

Don't worry, it might not take long (only some seconds)

That will make sure that you reduce the wooden easily. Some miter saws begin with a jerk, because of the pointy motion of the blade.

While some are prepared with soft-begin features that allow the blade to begin from rest without jerking the saw and visit full speed.

After the cut is done, you have to also launch your hand from the cause and allow the blade to forestall without lifting it from the workpiece yet, and also you need to also maintain the workpiece firmly at the miter saw desk.

Lifting the blade of the workpiece in advance earlier than it stops can motive the reduce to fly off the desk, in particular, if it's far small, and can purpose harm in case you strike a person.

Wednesday, November 25, 2020

How to Choose the Right Mitre Saw

A miter saw is the quickest way to come to be an obvious genius at precisely slicing lumber and trim. Sometimes known as a hacksaw, these saws make precise angled move cuts. They are in particular useful for repeating the equal cut at an angle, quickly and appropriately. Although all the fashions are similar, there are three foremost types to pick from.

Simple miter saws have a blade and motor assembly that rotates down into the wood to make every reduction. The wooden rests on a table that swivels one way or every other for angled cuts. A 10 ″ blade saw could make a ninety ° pass cut via a 2 × 6; a 12 ″ can take care of a 2 × 8. These simple saws were as soon as commonplace, however, today fewer manufacturers produce them.

Get one if:

  • Money is tight
  • You want a light-weight saw that you may deliver effortlessly.
  • It simplest makes vertical cuts (no compound angles).
  • You normally reduce 2 x 6 or much less.

Compound miter saws, like easy miter saws, rotate downward to finish a cut, but the blade and motor can also be tilted far from vertical at a variety of angles. This capacity permits angle control in two guidelines, so you can reduce compound angles. These saws cut the same width of timber as simple miter saws.

Get one if:

  • A little greater weight and a better rate are fine.
  • You are operating on trim, ceiling frames, or different tasks wherein cutting wooden at two angles is vital.

Sliding compound miter saws region the blade and motor assembly on rails or an articulated arm, so it could circulate back and forth, in addition, to tilt facet to aspect and swing all the way down to make cuts. The sliding motion lets in a 90ยบ cross reduce of wooden as much as a width of 12 ″, making this miter saw the maximum versatile. But there's an exchange-off for this variety of motion: extra components that move can suggest cuts that are less precise.

Get one if:

  • You are frequently slicing wide forums.
  • Weight and price don't trouble.
  • It is pleasant with slightly rougher and less particular cuts than different miter saws provide.

How to check your miter saw

The markings on the miter saw display 45 °, 90 °, and different angles. Don't continually agree with them. Try making a 90 ° vertical cut in a 1 × 3 or 1 × 4 directly. Flip the cutout over, then convey the reduced ends collectively, with the rims of each piece snug towards the fence. If there is an opening wherein the ends meet, that perspective is twice the error of the saw. Different saws regulate differently (check your guide). Once you set a ninety ° cut, all different aspect to side angles could be correct. On compound saws, repeat the test to make certain the blade is precisely vertical. If the 45 ° corners of your trim still do not match properly, blame the old door body or window body and make your cut a touch square to catch up on the usual log cabin awkwardness.

How To Use Ryobi Miter Saw? Step By Step

Some folks that do not know how to use a Ryobi miter saw call themselves first-time customers or beginners. For those workers, our crew is right here to speak about the vital steps of using this product to make it less complicated for them. All points are given below.

Step No: 1

If you want to reduce wood first, take your dimension and draw a line or, in easy words, the precise vicinity. Because this line will show the factor in which the worker is inquisitive about creating an exchange.

Also, we are trying to check that you aren't going to mock and cut down the wooded area. It would be useful if you had a motive for doing this process. Through this site, we will determine the duration of the wood and the attitude that you need to make a cut.

 Step 2:

Give extraordinary positions to the wood within the miter box. This may be your second step in studying the correct Ryobi miter saw strategies. The important issue is to put the timber towards the fence.

This step is very vital to recognize the accuracy and also in case you want to get a hundred percent end result from your device. Also, if you haven't performed it before, don't worry about this due to the fact you may fast get the best solution even on the first attempt. You will want to be careful when appearing in this operation.

 Step 3:

In this 3 step, whilst you start the operation, you have to provide a role to the screw gauge simply to get the angle at which you need to perform it. This will permit you to get all the crucial things.

If you want to make a direct cut in the cloth, you have to move the screw gauge to zero, so that it offers the trade you need out of your object. Also, if someone is inquisitive about a 30 attitude cut, they have to set the gauge to 30 to create those varieties of cuts.

 Step 4:


In the discussion above, we advised you that you have to keep and press the switch if you want to position the wood or the plumber towards the fence. Therefore, after doing so, the blades will move or rotate and move down at the wood to create a particular and particular reduction on the desired angle.

Similarly, when the primary reduction is to be finished, you need to move the timber to make another reduction to the end of your requirement. It is a reasonably easy method for all carpenters, whether they are specialists, intermediate users, and beginners.

 Step 5:

Before slicing, you need to preserve the wood within the actual spot on the device so you can create a reduction of your desire without any hassle. This will even no longer sense anything greater for the guide of your wood, due to the fact the device will provide an excellent guide in order that it does not pass in any respect.

Conclusion of using a Ryobi miter saw

As shown above, all the steps to the use of the Ryobi miter saw get you all the basics from it. Similarly, it isn't clean to use it without knowing the proper technique; Therefore, thru this article, our team will help you and show you the technique grade by grade. So be sure to examine it to your comfort.

Monday, November 23, 2020

How to Change Blade on Miter Saw

Here's a short look at the way to alternate a blade on a miter saw due to the fact when you have a DeWALT, Ryobi, Hitachi, Bosch, Delta, Craftsman, Porter-Cable, or another emblem of miter saw, in some unspecified time in the future you will need to update the blade.

Why exchange miter saw blades

There are several motives why you could need to change the blade for your miter saw. Your blade can be dull. You may additionally have a timber cutting blade installed on your miter saw, however, you do need to reduce a few sheets of steel. Or you could have a 24 teeth blade established which is ideal for reducing studs, but you need to put in a one hundred tooth blade to reduce some portions for a furniture project.

The miter saw the blade is stupid

Probably the maximum common purpose for converting a miter saw blade is that the blade has ended up dull and is not generating quality cuts.

What kind of blade need to you get if the miter saw blade is stupid? That will largely depend on the form of cuts you may make and we can delve into this further below underneath "Different Miter Saw Blades for Different Cuts."

In the intervening time, if you are like me and maximum of your miter saw cuts are for DIY furniture tasks, I really love the Freud Diablo Ultra Fine a hundred Tooth Saw Blade. This is the blade that I hooked up at the miter saw in my little workshop. The cuts are clean and sharp, precisely what I want for my DIY fixtures projects.

Is your blade truly stupid?

Did you know that a grimy blade can act like a dull blade? With each reduction, we reason the wood pitch to accumulate on our miter saw blades. As the timber builds upon the blade, it may have an effect on the fine of the cuts, leading us to assume that the blade is stupid. If left unchecked, this wood step can also corrode the blade.

How do you get rid of wood tar from the miter saw blade? With a unique purifier for blades and bits. Cleaning our miter saw blades is very simple and a critical part of the right preservation of our equipment. Please go to Clean Saw Blades for Maximum Performance and Quality Cuts to look at which purifier I use, the simple manner I use to smooth my saw blades, and the saw blade cleansing video.

Different Material Miter Saw Blades

Another purpose to trade the blade on your miter saw is to reduce an exclusive material. Saw blades are designed to cut particular substances. Not to make this sound too easy, but in case you want to cut a little timber, you will want a blade designed for slicing wood and if you want to reduce some metal, you'll want a blade designed for cutting steel.

Different miter saw blades for distinct cuts

Once you have decided what form of material to cut, the subsequent thing to look at is the number of teeth on the blade. I am not an expert on building saw blades, however, right here is my easy look at how the wide variety of enamel works on a miter saw blade.

Saw blades with greater teeth produce purifier, sharper cuts, whilst blades with fewer teeth produce hard, choppy cuts. The blades with more enamel are best for slicing portions for our DIY furniture tasks. Blades with fewer teeth are high-quality for reducing studs and building a house wherein you do not care what the cut looks like.

As I referred to earlier, my saw blade is the one hundred enamel Freud Diablo Ultra Fine saw blade. This is the saw blade that I established on my miter saw in my little workshop. I use this saw to construct DIY fixtures almost completely. The cuts are easy and sharp, precisely what I want for my DIY furniture projects.

How to exchange the miter saw blade

This educational shows a way to replace the saw blade on a Hitachi 10 ”miter saw. Consult your owner's manual for the way to alternate the blade to your unique miter saw. Is the guide to your saw missing? Don't fear, most modern-day device manuals are to be had online. Just Google the name and version of your saw or tool (eg, the Hitachi miter saw guide) and I guess you may locate the guide to your saw.

How to Use a Coping Saw on Cove Molding

Cove molding is aptly named for its concave profile that softens the appearance of the intersection in which a ceiling meets a wall. Crown molding is usually attached on the interior corners with miter cuts at the ends of each piece. But many inexperienced DIY fanatics discover it tough to make the concave moldings fit flawlessly with adjoining miter cuts. The solution is to apply a jigsaw to suit one cease of one part towards the face of the adjoining component. This saves time and improves the uniformity of the inside corners.

Start by measuring the lengthy and brief contrary partitions in a room. Work from ladders and feature an assistant assist you measure every wall on pinnacle from one cease to the other. Check the dimension for long partitions and degree portions of pine or hardwood trim lengthwise. Mark the points of the cuts with a carpenter's pencil.

Make rectangular cuts at the marks on every piece with a miter noticed or a miter field and hand noticed. Install the portions on the pinnacle of the longest walls with end nails and an end hammer. The length of the nails relies upon the scale of the molding. Typically, 4-cent end nails are used with a 3/four-inch cleat and 6-cent nails with a bigger cleat. Drive pairs of nails into the top and backside faces of the trim at 24-inch periods from end to give up.

Check your measurements for shorter partitions. Score a custom cup molding piece and cut opposing 45 diploma miter cuts at every end. The open faces of 45-degree cuts face each different, just like the inside miter corners in other forms of trim.

Place the shorter piece on a workbench with one-cease mitered extending just past one edge of the table. Use a pencil to highlight the cut line wherein the face of the miter reduces meets the completed face of the trim. Stabilize the part with one hand and reduce the line with a jigsaw to cast off the angled part of the miter reduce. Repeat this and face the miter cut on the alternative end of the piece.

Ask the assistant that will help you function the piece on the pinnacle of a shorter wall. Fit the ends of the piece with the caps in opposition to the corresponding ends of the longer portions at every nook. Nail the shorter piece with pairs of finish nails at 12-inch periods. Repeat the technique to cut and face the closing piece for the opposite, shorter wall. Install the piece among the other ends of the corresponding longer portions.

Saturday, November 21, 2020

How to use a Sliding Miter Saw?

Miter saws are available in all types of shapes, sizes, and colors. Generally, the sizes of a regular non-slip saw (or hack saw) variety from 7.25 inches to 12 inches, which refers to the size of the blade. Larger blades can reduce wider forums. Stationary compound miter saws, or "bench miter saws" or definitely, "compound miter saws" are specialized saws that do more than just reduce easy miter angles - they have a pivoting arm that lets in the blade to be tilt to at least one facet, ensuing in a "bevel" reduce.

These saws are generally known as "compound" because having the slanted attitude and miter angle planes make it possible to reduce two angles at an equal time.

What is better fashionable or sliding miter saw?

Sliding Compound Miter Saws - Click to look at our evaluation here, have all of the versatility of compound miter saws, but with greater flexibility as you've got a sliding arm or arms that assist you to circulate the blade both ahead and returned, and presents a longer reducing period. These gear will let you reduce some inches wider than the diameter of the blade, however are extensively extra pricey than a non-slip saw. However, if you may have the funds for it, we distinctly suggest a sliding miter saw, in case you need to cut wider materials often.

Slide miter saws make existence a lot less complicated and save a variety of time. The general slide miter saw has a trigger this is built into the cope with, and some actually have a safety button that needs to be pressed before pulling the cause. To begin a straight down reduce, press the safety button, then squeeze the trigger and look ahead to the saw blade to reach full torque. Then slowly decrease the saw onto the board or cloth you're reducing. While cutting, manual the saw down.

Once the cut is complete, release the cause at the same time as the blade continues to be in the fabric and permit it to return to an entire prevent earlier than lifting it out of the material. A compound slip miter saw will miter and bevel cuts at an equal time. Miter saws have a guide that lets you to support the return of the board as you cut to assist keep the board solid and help your miter saw cut to the proper diploma you have selected.

Many miter saws come with a clamp, which could be very helpful and acts as another "hand" to securely stabilize the board while you chop. If there may be no clamp for your saw, make sure your hand is continually placed far from the blade even as conserving the board against the fence. NEVER place your hand underneath the saw at the same time as it is turning, whether there's a protection or no longer.

How to perform a sliding miter saw?

When running a miter saw, there is a correct manner to make a sliding cut:

Start by placing your board against the fence and anchor it.

Before starting the blade, pull the saw towards you until the blade is at once over the brink of the board closest to you.

Squeeze the trigger to begin the saw and wait for it to attain complete rotation speed. Then pull the blade down and into the wood.

While the blade is still turning, push the saw again and far away from you because the blade cuts thru the relaxation of the wooden (see photograph under).

Once the blade has completed slicing the timber, raise the saw and launch the cause to forestall the saw.

Therefore, to make coincident cuts, you'll want to flip the workpiece and reset the angle to make certain it's miles correct earlier than transferring on to the second one bevel cut. But with a double bevel saw, you can make compound cuts in the left and right directions without having to turn the part; Instead, just use the swivel arm to turn the saw as it should be.

Conclusion

It all comes right down to that the primary gain of a sliding miter saw over a non-slip miter saw is that it is able to cut wider forums. Considering what you would need to use a miter saw for a maximum of the time, it is able to be really worth the time and money to put money into a slider. Although they may be appreciably extra high-priced than trendy miter saws, they're well worth it if you're going to place it to correct use.

How To Use A Miter Saw For Beginners and DIYers

The first element you need when getting ready to use your miter saw is the proper protection gadget. No one desires to get harm, so anybody should put on the proper gadget to assist reduce their possibilities of getting harm. With the miter noticed, this consists of protection glasses, earplugs, and for a few varieties of fabric (which include MDF), you can want to put on a face mask to avoid inhaling too much nice dirt.

Now relying on the sort of reduction you're going to make, you could need to make an adjustment to both the miter gauge, the bevel gauge, or each (for compound cuts). This adjustment is about by way of freeing the adjustment knob and rotating the reducing deck for a miter reduce or with the aid of tilting the saw with a bevel, or each for the compound. See the diagram here to determine which reduction you may need to make:

Cross-section

This is a 90 diploma cut via the grain of the board. This is achieved with the saw in a vertical position, zero ranges, on both the bevel and the miter gauges. This kind of cut is used to shorten a board to the duration and depart the brink at a perfect 90 tiers, in both planes, to the duration of the board.

This is a commonplace cut whilst building furniture, framing a wall, or cutting difficult board to length to make the job simpler, earlier than making end cuts.

The miter Cut

This is an angled reduction to the face of the board, but at the edge, it nonetheless cuts at 90 degrees. See the diagram above. This, as an example, would be used when reducing a door body on the pinnacle corners. This angle of reduction is created by means of adjusting the miter gauge in the front of the saw, aspect to aspect. Most miter saws can be adjusted from zero ranges, as much as 45 stages, or slightly more, either to the left or proper.

Bevel cut

This is basically a "slant reduce". The blade will lean left or right and reduce the wooden to create an angled cut along the brink of the board, even as the reduction across the face will nonetheless be ninety levels. See the photo above.

This kind of cut might be used for skirting around a corner of a wall, an outdoor corner, or an internal corner. Depending on which one, you would regulate the bevel from leaning left to leaning right, or in case you have a single bevel noticed, you would turn the desk over to make this variation.

The compound Cut

This is truly an aggregate of bevel and miter cuts. You need to regulate the miter perspective and bevel angle, lock them in the region, and make the reduction. This might describe the fourth image inside the diagram above. This is commonplace in crown molding when the piece is set up at an angle and has but to be joined flush with the adjoining piece at the corners of the wall. This can be complicated to apprehend, that is why maximum saws have wonderful blade stops at commonplace angles utilized in compound miter cuts for crown molding. Make certain you apprehend these angles properly before doing crown molding paintings.

Why Not Pull through a Sliding Miter Saw Cut?

My son these days requested me why I push my slide noticed (miter noticed), no longer throw it away. According to him, the manner the noticed blade rotates will preserve the board against the backrest and prevent the threshold of the board from bursting. What do you say? - Scott Elam

Tim Inman: Tomato or tomato? The noticed will reduce either way. That said, there are protection reasons for cutting by means of first extending the saw out of the "base of operations" after which turning it on and making the cut through balancing the noticed on the wood and pushing returned in the direction of the house or blade attachment location. . I suppose there may be additionally a quite right case for better overall performance doing it this way. 

One feasible point of bewilderment is that for my vintage nemesis, the radial arm noticed of the 1960s and Seventies, the "accurate" slicing series changed into to start the cut from the lower back (fence aspect) of the board and get rid of the carriage from the noticed. Through wood even as reducing. I don't like those saws for numerous motives. One of the principal motives is protection or the shortage of it. Remember, I taught high college children the way to use one's saws within beyond. I actually have first-hand enjoy, and from all my arms!

In milling or cutting, there may be a phenomenon known as "up-cut" or "up mill". These terms describe the impact of the cutter's teeth wanting to take large and larger bites of wood as they chew at the substrate in the query because of the way the reducing facet engages the wood. If this happens and it gets out of control (which can occur very quickly at times), the blade will move slowly uncontrollably up the wooden. 

If the device is not robust sufficient to withstand the pressure, the blade will climb thru the wood too speedy and can also climb over the wood without slicing it absolutely. This is scary and dangerous. I have "loved" this experience far too typically inside the school stores that I have taught not to feel the chills on every occasion this topic comes up. I never had an injury, but wow! 

Although the slicing route of the pressure vector from the blade tooth pushes the timber firmly lower back onto the rear guide, the opposite vector pushes the noticed with full chew force closer to the operator. 

With modern-day slide miter saws, which carry the noticed to the front edge of the board and make the cut when the noticed returns home, the sawtooth doesn't have any compromise to "climb" with the wooden. The phenomenon of escalation is defeated. The reduction is cleaner and the job is done plenty safer.

As for craftsmanship, while reducing efficaciously as defined for the miter saw, the blade passes the newly cut floor simplest as soon as. Cut completed, the saw finally ends up at the base of operations. Work is done. Cutting backward way that the noticed begins to cut out of the bottom role, then is pushed again past the just cut floor once more when engaged, until the noticed stops at the give up of the reduce. This, in my experience, never takes place. The result is a less smooth, fuzzy, and sometimes burnt area on the brand new cut.

So the short answer for "why" is "due to the fact". This is how I trained my children and the way my father educated me too. The longest solution is because it works higher and is tons more secure.

How to use a Sliding Miter Saw?

Miter saws come in all sorts of shapes, sizes, and colors. Generally, the sizes of a normal non-slip saw (or hack saw) range from 7.25 inches to 12 inches, which refers to the dimensions of the blade. Larger blades can cut wider boards. Stationary compound miter saws, or "bench miter saws" or surely, "compound miter saws" are specialized saws that do more than simply cut easy miter angles - they have got a pivoting arm that permits the blade to be tilt to 1 side, ensuing in a "bevel" cut.

These saws are normally known as "compound" because having the slanted perspective and miter angle planes makes it viable to reduce two angles at the same time.

What is a higher preferred or sliding miter saw?

Sliding Compound Miter Saws - Click to peer our evaluation here, have all the versatility of compound miter saws, however with more flexibility as you have got a sliding arm or hands that can help you move the blade each forward and returned, and affords an extended cutting duration. These gear allow you to cut some inches wider than the diameter of the blade but are substantially greater pricey than a non-slip saw. However, if you can manage to pay for it, we notably endorse a sliding miter saw, if you want to reduce wider materials regularly.

Slide miter saws make life a lot simpler and shop loads of time. The well-known slide miter saw has a trigger that is built into the cope with, and some also have a safety button that must be pressed earlier than pulling the cause. To start an instantly down cut, press the safety button, then squeeze the trigger and anticipate the saw blade to reach full torque. Then slowly decrease the saw onto the board or material you're slicing. While cutting, manual the saw down.

Once the cut is whole, launch the trigger while the blade continues to be in the material and allow it to come to an entire prevent before lifting it out of the cloth. A compound slip miter saw will miter and bevel cuts at an identical time. Miter saws have a guide that allows you to aid the again of the board as you cut to assist keep the board solid and assist your miter saw reduce to the suitable degree you've chosen.

Many miter saws include a clamp, which could be very helpful and acts as any other "hand" to securely stabilize the board while you narrow. If there's no clamp in your saw, make sure your hand is always placed away from the blade while protecting the board in opposition to the fence. NEVER put your hand below the saw even as it is turning, whether or not there's a defend or not.

How to function a sliding miter saw?

When running a miter saw, there is an accurate manner to make a sliding cut:

Start with the aid of placing your board in opposition to the fence and anchor it.

Before starting the blade, pull the notice towards you until the blade is immediately over the brink of the board closest to you.

Squeeze the cause to start the saw and look forward to it to attain a complete rotation pace. Then pull the blade down and into the wood.

While the blade remains turning, push the saw back and away from you as the blade cuts thru the relaxation of the wood (see picture underneath).

Once the blade has completed reducing the timber, boost the saw, and launch the cause to stop the saw.

When cutting thick material as a fence publishes, a sliding compound miter saw handles this much higher than a regular compound miter saw. Slide saws also are regularly used to reduce other thicker woods consisting of lumber, boards, and logs. Both varieties of miter saws are to be had in single or double stage models, and this evaluation has to this point carried out to single bevel fashions, which means that that they best permit you to make bevel cuts in a single route, left or proper.

Therefore, to make coincident cuts, you'll need to flip the workpiece and reset the perspective to ensure it is accurate earlier than transferring on to the second bevel cut. But with a double bevel saw, you can make compound cuts within the left and right directions while not having to turn the element; Instead, simply use the swivel arm to flip the saw accurately.

Consider this: If you normally use a desk saw to rip or cut wide forums, and are pretty skilled with a round saw, you probably don't even want a miter saw. However, if you do a lot of extra precise expert jobs like mitering (framing, trim, and many others.), or if you mill or square your difficult wood a lot, miter saws are your exceptional option and might make your lifestyles plenty simpler. . They also are superb additions to the storage, no matter how you have a look at it.

Now in case you need to use your miter saw on something large than an 8-inch board, you will put money into a very good slide saw. However, if you most effectively need a miter sawto cut 45-diploma miter molding or image frames, you may be first-class with a less expensive 10 ”non-slip saw.

Conclusion

What it all boils right down to is, the principle benefit of a sliding miter saw over a non-sliding miter saw is that you may cut wider forums. Considering what you would need to use a miter saw for within the majority of the time, it is able to be really worth the time and money to invest in a slider. Although they're significantly extra high priced than trendy miter saws, they are properly well worth it if you are going to get some top use out of it.

Why You Should Watch Anime

 Anime isn't like maximum kid's cartoons, and care should be taken whilst allowing them to watch it. Anime, also called Japanese ani...